Serving Private Content of S3 through CloudFront Signed URL
14 Jun 2018CloudFront is a popular web service by Amazon. It speeds up distribution of static and dynamic content to the users. CloudFront rapidly distributes the contents by routing each user request to the edge location that can best serve your content. Typically, this is a CloudFront edge server that provides the fastest delivery to the viewer. You create a CloudFront distribution to tell CloudFront where you want content to be delivered from, and the details about how to track and manage content delivery. Then CloudFront uses computers — edge servers — that are close to your viewers to deliver that content quickly when someone wants to see it or use it.
AWS S3 is an object level storage built to store and retrieve any amount of data from anywhere on the Internet. It’s a simple storage service that offers an extremely durable, highly available, and infinitely scalable data storage infrastructure at very low costs.
In this post, we’ll see how we can serve the contents of s3 through CloudFront generating a signed URL. By doing this we can secure object endpoint and also get the contents much faster.
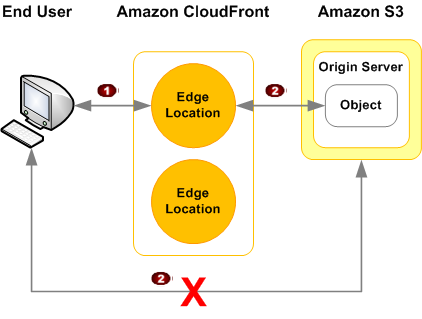
- Restrict access to objects in CloudFront edge caches
- Restrict access to objects in your Amazon S3 bucket
Create CloudFront Keypair. You need to login to your AWS account using root credentials. You cannot do this via an IAM user at the moment.
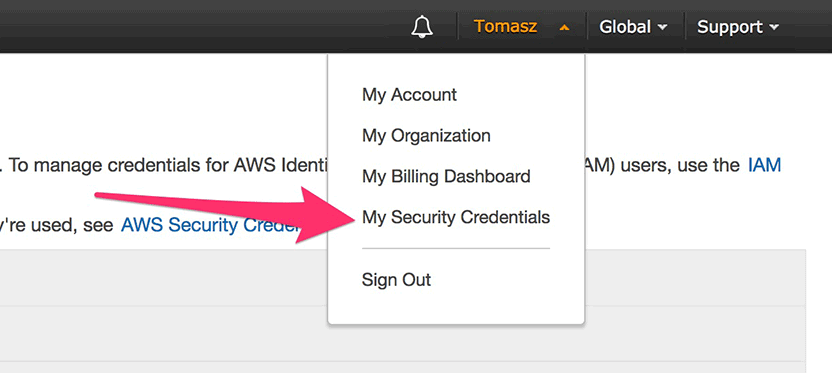
Go to My Security Credentials then Cloudfront Key Pairs and create your key pair. Make sure you download the private key after creation and note the key ID (which is also in the filename of the downloaded key). You must download the Public(rsa) and Private(pk) key .pem extension and save the Key ID.
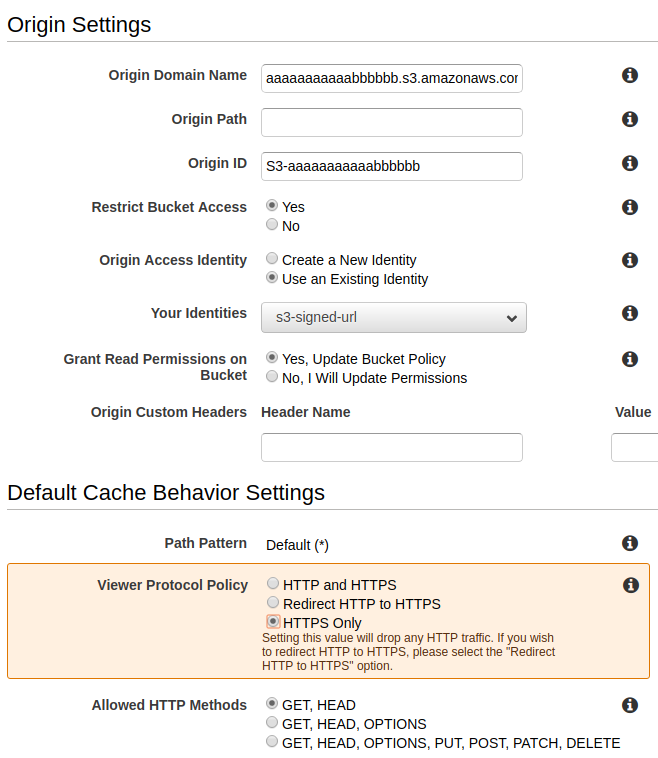
Create S3 bucket “aaaaaaaaaaabbbbbb” and upload some files into it.
In cloudfront distribution security, create Origin Access Identity, which is a special CloudFront user, and associate the origin access identity with your distribution. (For web distributions, you associate the origin access identity with origins, so you can secure all or just some of your Amazon S3 content.) You can also create an origin access identity and add it to your distribution when you create the distribution. only the origin access identity has read permission (or read and download permission). When your users access your Amazon S3 objects through CloudFront, the CloudFront origin access identity gets the objects on behalf of your users. If your users request objects directly by using Amazon S3 URLs, they’re denied access. The origin access identity has permission to access objects in your Amazon S3 bucket, but users don’t.
Create CloudFront Distribution for Web.
Hit Create distribution.
After creating the distribution you can see the bucket policy
{
 "Version": "2008-10-17",
 "Id": "PolicyForCloudFrontPrivateContent",
 "Statement": [
   {
   "Sid": "1",
   "Effect": "Allow",
   "Principal": {
       "AWS": "arn:aws:iam::cloudfront:user/CloudFront Origin Access Identity your_OAI_ID"
    },
       "Action": "s3:GetObject",
       "Resource": "arn:aws:s3:::aaaaaaaaaaabbbbbb/"
    }
  ]
}
Generate a signed URL using python sdk for aws. Create a script “boto3_signed_url.py”.
The script :
import datetime
from cryptography.hazmat.backends import default_backend
from cryptography.hazmat.primitives import hashes, serialization
from cryptography.hazmat.primitives.asymmetric import padding
from botocore.signers import CloudFrontSigner
def rsa_signer(message):
# .pem is the private keyfile downloaded from CloudFront keypair
with open('pk-MOUPJHBLKJN65L1BH.pem', 'rb') as key_file:
private_key = serialization.load_pem_private_key(
key_file.read(),
password=None,
backend=default_backend()
)
signer = private_key.signer(padding.PKCS1v15(), hashes.SHA1())
signer.update(message)
return signer.finalize()
key_id = 'MOUPJHBLKJN65L1BH'
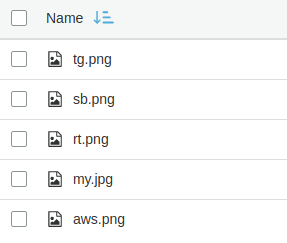
url = 'https://u09vcb1sd98xfb.cloudfront.net/rt.png'
current_time = datetime.datetime.utcnow()
expire_date = current_time + datetime.timedelta(minutes = 2)
cloudfront_signer = CloudFrontSigner(key_id, rsa_signer)
# Create a signed url that will be valid until the specfic expiry date
# provided using a canned policy.
signed_url = cloudfront_signer.generate_presigned_url(
url, date_less_than=expire_date)
print(signed_url)Run the script:
python boto3_signed_url.py
This will return a signed URL of that .png file. If you paste the url in your browser, you’ll get the image.